This Money Saving DIY Laundry Pre-Treat is the first of many articles I’ll be sharing on DIY Cleaners and Non-Toxic Home Fixes. Please let me know what products you’d like me to feature!
This post contains affiliate links. If you click through a link I may get a small commision at no expense to you. Read my disclosure policy here.
Have you seen the cost of Shout or other laundry pre-treat products lately? Honestly, I haven’t – because I got completely fed up with the prices many years ago!
I discovered my first laundry pre-treat recipe on The Frugal Girls website. It’s still a great resource!
Instructions for Making Money Saving DIY Laundry Pre-Treat
Money Saving DIY Laundry Pre-Treat is easy to make and use. Occasionally, I have to pre-treat more than once, but I’ll live with that for the price differential.
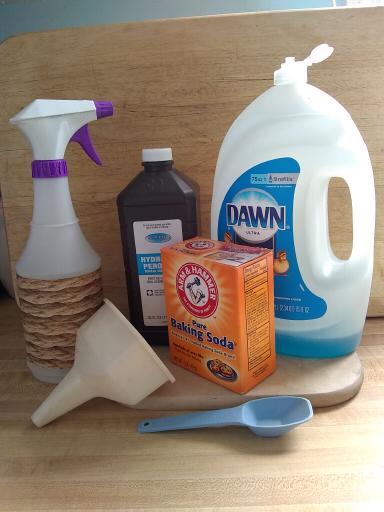
First you will need to gather all of your materials. It’s a great idea to always check your shelves before you go shopping! After all, if you have the item on hand, why bother with the time, effort and expense of shopping.
- Empty spray bottle, preferably dark colored.
- Funnel
- Hydrogen Peroxide
- Dawn original blue dish soap
- Baking Soda
- Measuring Spoon, 1T or 1/8 cup
- Permanent Marker
If you need to shop for any of these items, I recommend you start at Dollar Tree. I could have said a dollar store, but in my experience only Dollar Tree offers items for a dollar! I can usually get a 32 oz container of Hydrogen Peroxide for $1. They regularly carry plastic spray bottles (though they don’t tend to hold up well over the years) and they are likely to have the other items too.

With the funnel, add 16 oz of Hydrogen Peroxide to the spray bottle. Next, add about one third to half a 9 oz. bottle of original blue Dawn. I just estimate the Dawn and use about half my 32 oz bottle of peroxide, but you can use a liquid measuring cup if you want to be exact. Then add 2 Tablespoons of baking soda and swirl to mix. That’s it!
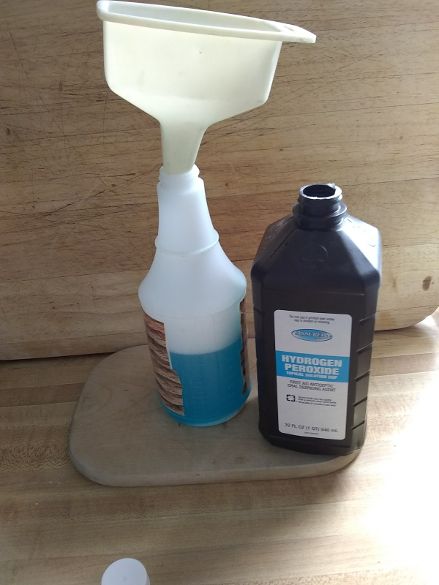
Start with the Hydrogen Peroxide 
Add dish soap next. 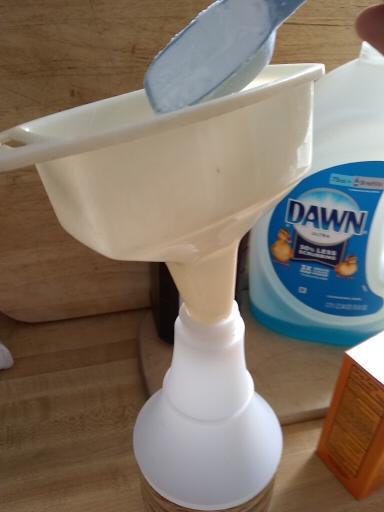
Add baking soda last.
Important Tips:
- If you are re-using a spray bottle, be sure it didn’t contain anything hazardous, and that it’s thoroughly washed.
- Don’t put the baking soda in first or it will be difficult to mix. I learned this the hard way, even though I’ve been making this for years!
- Swirl gently to mix so the solution doesn’t foam up and out!
- Use a dark spray bottle to keep the hydrogen peroxide from decomposing from light exposure.
- If you don’t have a dark bottle, keep your money saving DIY laundry pre-treat inside a cabinet, out of the light.
- You can also mix the solution in an empty peroxide bottle and pour on stains instead of spraying.
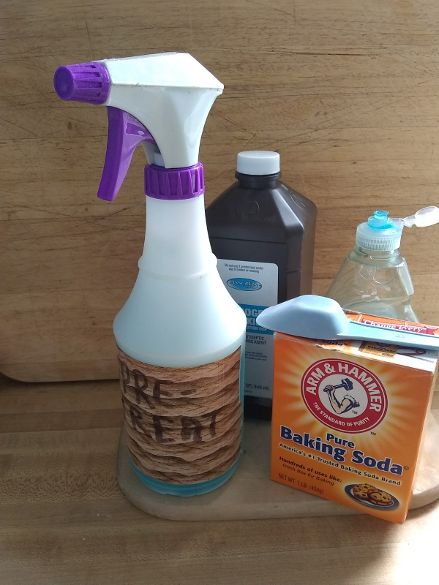
- Use a permanent marker to label your Pre-Treat.
Articles you may find helpful:
How to use your Money Saving DIY Laundry Pre-Treat
Before putting each load of laundry in the washer, take a quick look to see if anything needs pretreating. Though I’ve encouraged my husband to let me know to be on the look out for a stained item, I still need to check! I spray stains heavily, so the solution gets used up quickly, but I always found the commercial pre-wash products were used up even faster!
When I fold laundry, I look over the garments. If I find a stain that I missed, or one that was pretreated but not completely gone, I just toss it back to do again. Since my clothes are nearly all hung to dry, I rarely have to worry about the dryer setting a stain.
What cleaning or home products would you like to learn how to make at home?
Subscribe to my newsletter to get all the cleaning product recipes as they are published!