I have been composting for years. Even before we built our compost bins, I put food scraps out in the back of the yard to decompose.
This post may contain affiliate links. Check out my newest vendor, The Zero Waste Store, below. See my disclosure policy here.
There are two main reasons to compost. The first is that you need to do something with your kitchen scraps, and garden or lawn waste, and it should NOT be to put them in the landfill in my opinion. These biodegradable materials are meant to be used to nourish the Earth; it’s part of the natural cycle. Americans waste so much food that 30 to 40 percent of food supplies end up in landfill. We can absolutely reduce that amount by only buying and preparing what we need and making use of leftovers. But there will always be some scrap.
I’m thrilled to bring you products from The Zero Waste Store! Click banner above to browse!
Second, compost is a great source of fertilizer for your garden. Because it nourishes the soil and makes your garden plants healthier, there is less need for fertilizers, water or pesticides. It keeps the soil from getting depleted over time and helps prevent soil erosion.
What is Compost?
Compost is a mix of green (nitrogen rich) and brown (carbon rich) materials that decompose to make an excellent soil amendment.
What Can Be Composted
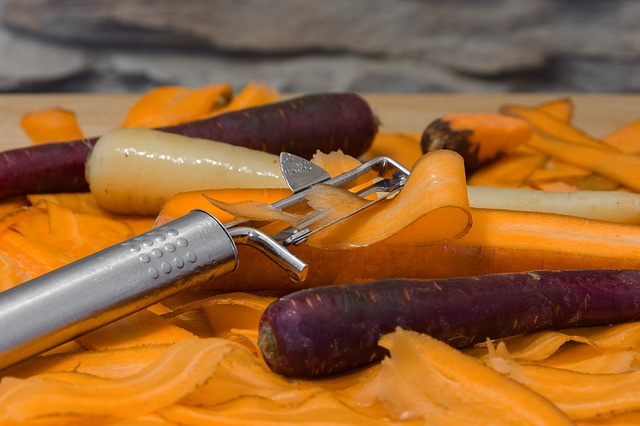
The most obvious items that can go in compost are coffee grounds, egg shells, vegetable and fruit scraps and lawn and garden debris such as leaves, grass and weeds. Here’s a breakdown of materials by “color”:
Brown Materials (Carbon Rich)
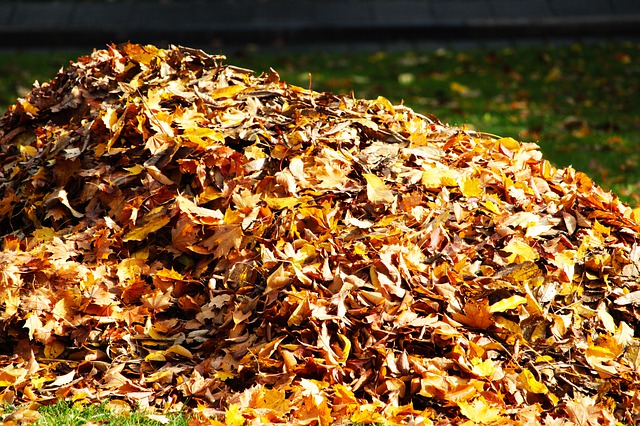
- Dried Leaves
- Dried Grass, preferably not treated with pesticides
- Cardboard, Shredded
- Toilet Paper Tubes
- Cardboard Ear Swabs
- Hay or Straw
- Wood Chips, Shavings or Sawdust
- Dryer Lint
- Cotton Cloth, cut in small pieces
- Old Herbs or Spices
- Brown or Unbleached Paper or Black and White Newspaper, Shredded
- Wood Ash
- Bedding from Animal Pens
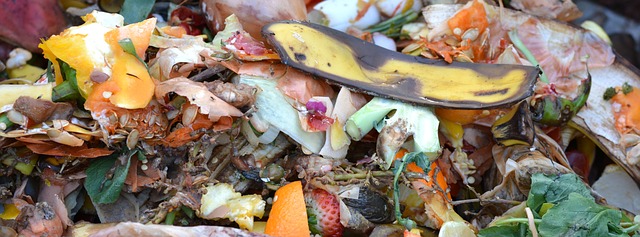
Green Materials (Nitrogen Rich)
- Green Grass Clippings, preferably not treated with pesticides
- Fruit or Vegetable Scraps
- Banana Peels
- Coffee Grounds
- Pine Needles (use sparingly)
- Tomato Sauce
- Fruit Juices
- Seaweed or Kelp, rinsed
- Fresh Herbivore Manure
- Hair, Pet or Human
It’s important to combine both brown (carbon) materials and green (nitrogen) materials. Too much green can be smelly. Too much brown and it won’t break down as well. Science says 30 parts carbon to 1 part nitrogen is best because the microorganisms that break down compost thrive with that combination. By volume you will actually want about 2 parts green to 1 part brown since brown materials tend to be fluffier and take up more space. It’s best to alternate layers of the green and brown materials and to cover green materials with brown to prevent odor and keep those microorganisms working.
Do NOT Put in Compost
- Meat
- Bones
- Oils
- Dairy
- Pet Waste
- Human Waste
- Pressure Treated Wood
- Weeds that have gone to Seed
- Plant Material Infested with Insects
Collecting Kitchen Scraps
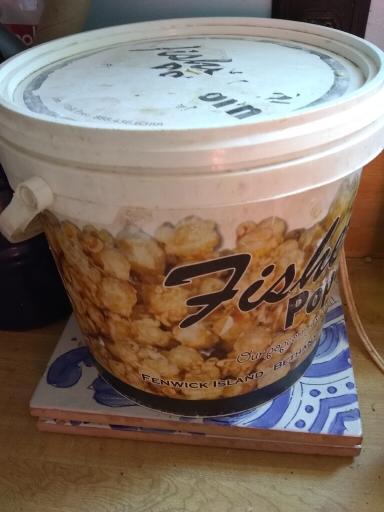
It’s easy to collect scraps in the kitchen with a bucket or container in you keep on the counter, under the sink or if you prefer, in the garage. Keeping a lid on the container cuts down on any smell. You can also get special compost containers with filters to reduce any smell.
Where to Put the Compost
Find a spot in your yard away from the house to create a compost pile or place a bin. The ideal size is at least 3 feet high, deep and wide. If you simply don’t have room to have compost outside you still have some options! You can check your town’s website to see if there is a community collection site for compost materials. Some towns even pick up compostables along with garbage and recycling. You can also see if any neighbors are composting. I know I welcome contributions from neighbors such as old jack o lanterns, coffee grounds, or kitchen scraps. There are also small, indoor composters available for apartment use.
How Long Does it Take?
Compost can be ready in anywhere from 2 months to a year, depending on how you manage it. This includes maintaining the right balance of green and brown materials, the proper moisture level, and sufficient oxygen which is done by turning the compost. The better you manage these variables, the hotter your compost will be and the faster it will “cook” at temperatures up to 170 degrees F. Chicken manure, which I will be composting for the first time this year, requires a full year to decompose.
It’s recommended that the compost be turned every 7 to 10 days. Some sources suggest turning it even more! By mixing the outer cooler, drier materials with the warmer, damper materials toward the center, you aerate the compost pile to keep the microorganisms working. If allowed to become anaerobic, the compost can start to smell.
You can also purchase or make an aerator. The DIY approach can be as simple as sticking a metal pole in the compost and stirring it enough to create a hole for oxygen to get in. Or you can drill holes in PVC pipe to keep in the compost with the ends extended outside of the material. I have never been very good at staying on top of turning the compost. I will definitely be using a DIY aerator this year.
It’s best to keep your compost damp, like a wrung out sponge, but not too wet. Ideally, you will use a hose to wet each layer of compostables you add. During rainy seasons, consider putting a cover over the compost such as a tarp or piece of plywood.
Compost Activators
Compost Activators can help rev up your compost so it’s warmer and decomposing faster. These are high in nitrogen and include blood meal, bone meal, and alfalfa meal, Other activators are enzyme based and mixed with water before adding. Manure, fresh or dried, and coffee grounds can help activate the process too.
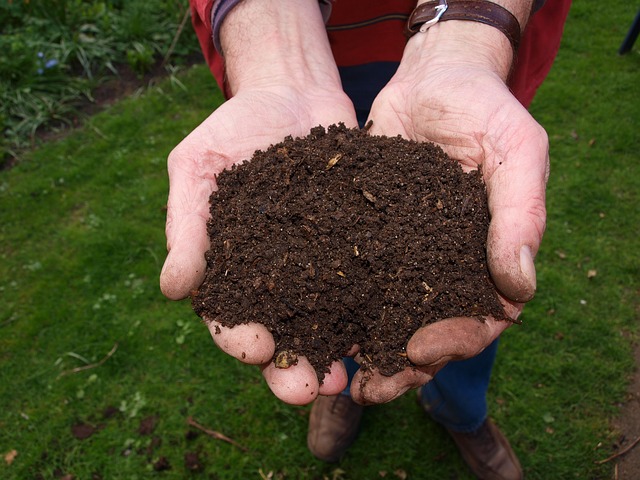
How Do I Know When the Compost is Ready?
Your compost is ready when it looks like dark soil and individual materials are no longer recognizable. Unless you are routinely turning your compost, you’ll find the best, most decomposed material toward the bottom of your pile. You can use the compost to prepare your garden beds before planting. Or you can use it as a mulch or “side dress” by spreading it alongsige your plants.
Bins and Composters
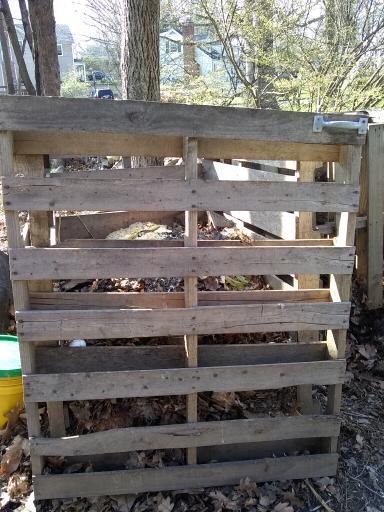
There are many designs of composters available for purchase. We built ours out of old pallets creating 3 sides and a door for the front. You can also make one with 3 sides and a top. If you are serious about gardening or growing your own food, it may be worthwhile to have more than one compost bin. We currently have two; one that we are adding to regularly and another that is nearly ready and only getting turned.
Please share your experiences with composting or feel free to ask questions in the comments section below.
Would you like to read more about composting, gardening, and being ecofriendly? Please subscribe to my newsletter, here!
Pingback: Saving Water in the Garden | My Frugal Nature
Pingback: The State of My Garden | My Frugal Nature
Lots of great information Kerry. I especially liked the lists of items to compost. I never thought about putting dryer lint or old herbs and spices in there!
I always ask myself, before I throw something out, how else can this be used? Dryer lint rarely gets to our compost since when we even have any, it’s used as a fire starter!